
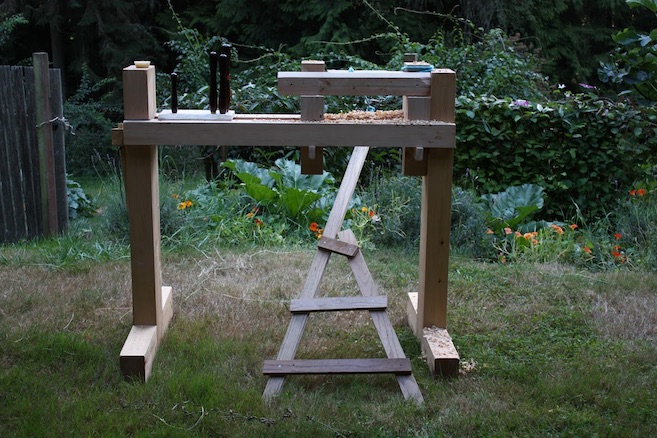
In May of 2016, I started making a pole lathe. I don’t know why I started making a pole lathe, but perhaps it was because I liked the design of Roy’s pole lathe and I acquired some free timbers which fit. The design made heavy use of wood: 4x8 legs with 4x6 feet and a lathe bed made with 4x4s. The lathe bed was connected to the legs with dovetails, meaning the legs needed to protrude several inches above the bed.
While building the lathe, I worried that my timbers were absurdly large. My friend Paul mentioned, “what are you going to be turning, elephants?” when he saw my stack of timbers. However, I’m quite happy with the design after completion. It’s solid construction limits vibration and rocking and it’s stable enough that I can stand on it without concern. To have build something so stable without fasteners is a point of pride. I probably won’t need to disassemble my pole lathe, but I could.
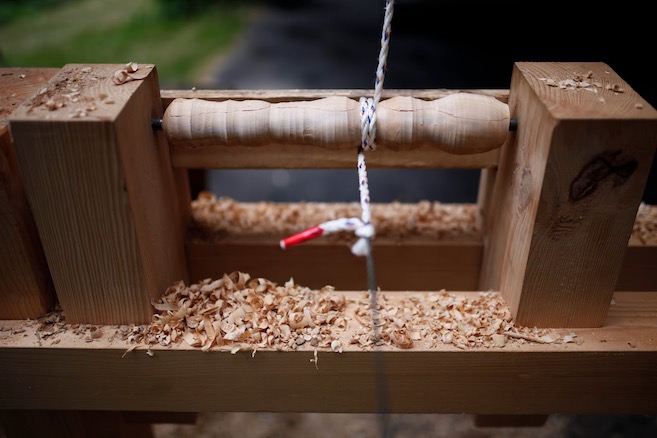
My first attempt at turning went pretty poorly. I used a single thin board as my treadle. It flexed and swayed side to side. I rigged a bike tube in my garage ceiling, which wacked me in the head. I used thin inexpensive cord which bound easily and frayed quickly. My tool rest was poorly positioned, unstable, and far from the workpiece. On top of this, I used a carving gouge that wasn’t sharp. Nonetheless, I made something that was round, although splintery.
Much of the challenge in making my pole lathe run smoothly has been in tuning the tension, improving the tool rest, and making a more stable treadle. Discovering more turnable pieces of wood has also helped.
Tension
Ideally the tension would increase linearly during the entire turning stroke. Unfortunately, bungees don’t work this way. The tension starts out minimal and increases too much when the threadle hits the ground.
I started with a bike tube oriented vertically. This worked poorly because it required a lot of vertical distance, which limits the potential length of a stroke.
Mounting the bike tube horizontally (secured at two points) and then pulling down from the center worked better. Unfortunately bike tubes easily snap if they are overexterted–good thing we had several! I found that it’s important to have enough force to quickly return the piece, but similarly important to not have too much tension or I would overwork myself for little gain.
Treadle
Roy Underhill says he prefers using a single board as a treadle. He must be significantly more balanced than me, because I find that a single board works terribly. Every few strokes my foot wobbles, causing the string to walk along the turned piece and ultimately bind against the poppet.
Instead, I prefer a Y-shaped treadle, where the forked bit contacts the ground. I tried building a Y out of oak floorboards, but the boards flexed, wasting potential tension, and the fasteners (both screws and nails) failed.
I switched to a vine maple crotch with tenoned cross-branches in the Y. This transformed my turning night and day. Not only did my treadle resist wobbling, but it stayed perfectly rigid causing a smooth stroke. Unfortunately my mortises weakened the treadle until it failed. I built a new one out of another crotch but with oak boards fastened across with brass rivets.
Spring Pole
My next experiment was to use a spring pole instead of bike bungies. My first pole was too short (around 24 feet) so I upgraded to a pole that’s over 30 feet long. I first propped my pole up with an X I built with two cedar branches bound together, but I upgraded to a crotch I hammered into the ground. I needed to balance where I put the crotch–if it were too near the bottom of the spring pole than there would be too much leverage and if I put it too near the top then I would not have enough hight to have full turns.
The spring pole doubled as an unparalleled cat toy.
Double Spring Pole Lathe
As winter came, I needed an indoor solution to my pole lathe because it’s constantly raining and it’s dark by 5. At first I thought I should jump headfirst into building a treadle lathe, but instead I built a double spring pole lathe, roughly following Roy Underhill’s design in The Woodwright’s Shop: A Practical Guide to Traditional Woodcraft.
The double spring pole lathe conveniently places the spring pole underneath the lathe bed and uses a pivoted arm to magnify the spring pole distance. You can also slide a clamp along the spring pole to adjust the tension for infinite adjustability. Unfortunately my shop has a low ceiling, which limits the height the pivot arm can swing to. Whereas with my spring pole I can often get 5 turns, with my double spring pole I only get around 3. Regardless, it’s been a handy machine for indoor turning!
Ultimately however, the “double spring poles” broke when I turned larger objects and I went back to the pole lathe.
Class with Jarrod Dahl
In late October 2017 I took a pole lathe turning class with Jarrod Dahl at the North Folk School in Minnesota. I learned several great tips from the course:
- Cannisters, or end-grain cups, are turned from radial (quartersawn) pieces.
- End-grain cups can be turned with projections (such as handles) by hewing out a bit of the handle and then banging the hook against the projection as the rest is turned away. Finally, the projection is carved.
- To use a bungee inside, buy the largest bungee you can find and wrap it back and forth 5-7 times at about 75% tension.
- Jarrod’s lathes are made from a single timber with a slot cut down the middle. The legs have square feet which allow small adjustments for leveling by rotating.
- A pin added to the end of the wedge keeps it from flying out.
- Jarrod doesn’t heat treat (i.e. quench) his hook tools when forging. Rather he normalizes them (heat to orange and then cool) a few times and then lets them cool slowly. His hooks last him 1-2 years and he uses 5/8 O-1 steel. The wider diameter stock limits flex.
- Jarrod uses the largest starter cord he can buy for drive cord.
- A 1.25” tall tool rest allows you to grip the tool effectively.
One of the main take-aways was how much you should cut in arcs when using a pole lathe. Instead of pushing the hook tool in or out from the piece, you should pivot the tool along the tool rest to cut in a clean arc. Slow arcs make clean cuts and avoid spiraling when turning the bowl.